MERRY CHRISTMAS
Thursday, December 10, 2015
Wednesday, November 25, 2015
Tuesday, November 17, 2015
I placed just some of my mini purchases made at Philadelphia Miniaturia. The Victorian widow lady having tea; the lovely young lady in my Tea Garden; the mounted unicorn head in my wizard room box; tiny copper bowl and knife for bloodletting on the shelf in my Medieval Apothecary building ; bread basked on the back of the delivery bicycle.
Tuesday, October 27, 2015
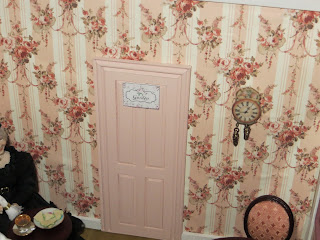
This gentleman (made by Terri Davis) is waiting for his tea companion to arrive.
I have created a walkway between the tea room and garden. I've also made another walkway to go behind the tea garden and bakery. It will me to add the big bakery kitchen room box as part of the whole project.
This is really turning into a BIG scene.
I have created a walkway between the tea room and garden. I've also made another walkway to go behind the tea garden and bakery. It will me to add the big bakery kitchen room box as part of the whole project.
This is really turning into a BIG scene.
Monday, October 19, 2015
Wednesday, September 23, 2015
Saturday, September 19, 2015
details, details
Small details for my Medieval Apothecary still being tinkered with. Do I want the sheep here or not? And still waiting for a fireplace for the interior.
Tuesday, September 15, 2015
still adding finishing touches to my Medieval Apothecary
added herbs hanging from rafters and ladder to loft.....still waiting to replace hutch with fireplace
Sunday, September 13, 2015
home decor being updated
Besides tackling mini projects I'm also getting a few things redone around here starting with the kitchen. New upholstery on window bench, new carpet and giant ceramic rooster .... going "heavy" into the Rooster theme. Love my anniversary present of the LARGE ceramic rooster!
Saturday, September 12, 2015
nearing completion on long-standing unfinished project - a Medieval Apothecary
The prospect of presenting a program on making and collecting dollhouses and miniatures has spurred me on to finish projects that have been languishing in my craft room - - some for a couple of years, at least.
One of them is my "Pillendreher" which was an online project involving materials and techniques I'd never worked with. I've let it sit for a couple of years aware of every mistake I'd made on it.
I decided to tackle it no matter what. Bite the bullet and just do it - - mistakes and all.
Here it is, almost done except for more bits and pieces on the shelves and a fireplace to be added in place of the hutch.
It is now my "Medieval Apothecary" rather than Pillendreher. Just added the apothecary sign today.
Wednesday, August 19, 2015
Tea Garden added to Street of Shops
Tea Garden and walkway squeezed between Tea Room and Corner Bakery......the Kitchen will go behind the bakery and garden.
Monday, July 20, 2015
decorating in progress
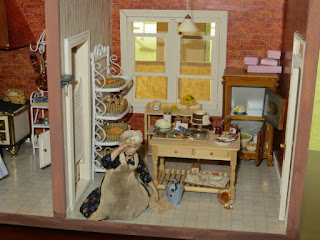
I've begun adding the miniatures I collected over quite a period of years.
I still plan to add shelves on the left wall above the prep shelf and sink.
Also have a copper hood for the stove.
Then it is curtains and entry door knobs.
Who knows what else?
I still plan to add shelves on the left wall above the prep shelf and sink.
Also have a copper hood for the stove.
Then it is curtains and entry door knobs.
Who knows what else?
warped room box presents a challenge
In order to use the kitchen-related miniatures I had collected in anticipation of a project that never marterialized, I purchased a big & cheap roombox.
However the larger pieces (top and bottom) were warped so I went through a prolonged process trying to flatten them out - - weights, misting the wood, more weights. Not very successful though.
So, I went ahead and put it together using glue and resorting to nails and heavy weights again.
Finally it is together flaws and all. Just hoping that once the minis are in the flaws won't be too noticeable.
Saturday, May 30, 2015
Subscribe to:
Comments (Atom)
Wizard's Roombox

another view of my Wizard's room


